Mon - Fri 09:00 - 17:30
Call Us: London / Leeds / Birmingham

by Simon Burfoot
Creating a home photo studio can be an exciting and rewarding exercise, allowing you to explore your creativity and capture professional-quality images in the comfort of your own space.
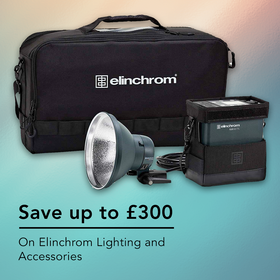
To help you get started, we've put together a list of ten essential tips tailored to photographers at the start of their journey and those interested in the versatile Elinchrom D-Lite RX To Go Sets; they offer excellent colour and exposure accuracy, portability, and a range of accessories, making them the perfect partner if you're just getting started in flash photography, so let's dive in!
Select a suitable area in your home for your studio; it could be a spare room, a basement, or even a corner of the living room; make sure that the space provides enough room for your equipment, subjects, and props and offers control over ambient lighting.
As a general guideline, it's recommended to have at least 10ft x 10ft of space when using the lower-powered Elinchrom D-Lite RX ONE heads and twice this for the powerful D-Lite RX 4 head, which will allow for flexibility in setting up various backdrops, props, and equipment, while also giving you ample room to manoeuvre and capture different angles.

(c) Simon Burfoot
Ceiling height is another important consideration; for most photography, a minimum ceiling height of 8 feet is generally sufficient, but this may differ based on the type of photography you specialise in; for newborn photography, a smaller space is often preferred as it creates a cosy and intimate setting, which is easier to heat and keep warm; on the other hand, family portraiture often benefits from larger spaces to accommodate multiple subjects comfortably. If you plan to work with certain types of equipment, such as light booms or overhead setups, you may want to opt for higher ceilings, preferably 10 feet or more.
To ensure maximum control over your images and eliminate clashing light sources, it's important to minimise ambient light in your home studio. While utilising window light as a natural fill can be beneficial, consider turning off room lights or drawing curtains/blinds to block out external light sources. This allows you to have full control over the lighting conditions and create consistent results. Pair this with a softox and grid combo, such as the Rotalux Go Softboxes in the image below, and you can keep control over your light inside the studio.

A dark studio will allow you full control over your images
Understanding lighting is a crucial aspect of photography, as it's the foundation for capturing stunning images. The Elinchrom D-Lite RX 4/4 To Go Set is an exceptional tool for photographers looking to master lighting techniques, with two flash heads that provide remarkable colour and exposure accuracy.
To truly unlock the potential of these lighting kits, it's essential to experiment with different lighting setups. For instance, three-point lighting is a classic technique that involves using three light sources: a key light, a fill light (you can use a reflector for this, more on that later...), and a backlight. This setup allows you to create a sense of depth and dimension in your photographs, highlighting the subject while minimising shadows. Alternatively, butterfly lighting involves positioning the main light source directly in front and above the subject, casting a soft, flattering light on the face. This technique is commonly used in portrait photography to create a glamorous and ethereal effect. By exploring various lighting arrangements with the Elinchrom D-Lite RX To Go Sets, you can manipulate the mood, drama, and focus of your images, elevating your photography to new heights.

Example of Butterfly Lighting (c) Simon Burfoot
Transform harsh, direct light into beautifully soft light with the help of a quality softbox. The Elinchrom D-Lite RX One/One To Go Set includes two Portalite softboxes (66cm square and 56cm octagonal) to diffuse, shape, and soften the light emitted from your flash heads. This will provide flattering and even illumination, reduce harsh shadows, and create a pleasing light quality that works well for portraits, newborns, and product photography. Let softboxes be the secret weapon to make your images stand out from the crowd! Remember, the larger the light source, the softer and more natural the light will look.

Large Softboxes create soft shadow transitions (c) Simon Burfoot
Selecting the right lens is crucial for capturing stunning portraits in your home studio. The Elinchrom D-Lite RX To Go Sets provide excellent lighting options, but pairing them with the perfect lens can elevate your portraits to the next level. Consider investing in a lens with a focal length between 85mm and 100mm for flattering perspectives and beautiful background separation. These lenses excel at capturing the nuances of facial expressions and creating a pleasing depth of field. Experiment with different lenses to find the one that suits your style and achieves the desired aesthetic in your portraits. AT TFC we offer a wide range of camera lenses, if you need any advice on which are best suited to your shoot, please get in contact.

When it comes to photography, props and styling play a crucial role in enhancing the overall composition and visual appeal of the photos. Whether you're capturing family portraits, newborn photography, or fashion shots, incorporating props can elevate the aesthetics and bring a touch of charm and personality to your images.
In family and newborn photography, props offer an opportunity to add a layer of visual interest and storytelling to the photos. Items like blankets, baskets, and toys can create a warm and inviting atmosphere, evoking a sense of cosiness and capturing precious moments. These props can be carefully selected to match the theme or style of the shoot, enhancing the overall concept and creating a more cohesive look. By using props that complement the subjects and their personalities, you can add depth and character to the photographs, making them more engaging and memorable.

Consider using props and styling to soften newborn imagery (c) Nicole Whyte
In product photography, props serve a different purpose. Here, the goal is to showcase the products in the best possible light and create a visual narrative that helps consumers understand the features and context of the items. Props can be strategically chosen to enhance the product's story, highlighting its purpose, benefits, or lifestyle associations. For example, if you're photographing a coffee maker, including coffee beans, mugs, or a sleek kitchen counter can create a more immersive experience and emphasise the product's functionality and appeal.

"Accessorise" your food shoots to tell a story (c) Michael Sewell
When it comes to fashion shoots, props can be chosen to enhance the narrative, create a specific mood, or add an element of surprise to the images. These props can range from everyday objects to more elaborate and unconventional items, depending on the desired artistic vision. For example, props like hats, scarves, jewellery, sunglasses, or handbags can be used to accentuate the fashion pieces and highlight their details, textures, or styling possibilities. Additionally, props such as flowers, balloons, mirrors, or vintage furniture can be employed to create a specific ambience, appeal to the right consumer, or evoke a particular era or style.

Use props to enhance the visual narrative (c) Yuliya Panchenko
Consider the background options for your studio. Solid-coloured backdrops, such as Colorama seamless background paper or fabric sheets, offer versatility and allow your subjects to stand out. Alternatively, you can create interesting textures or scenes by using props, wall art, or even shooting against a textured wall in your home. To save costs, a black and a white paper roll should be the minimum, and adding a grey will finish the setup perfectly as you can make grey any colour you like by adding some gels.

Colorama backgrounds add a splash of colour to your shoot (c) Simon Burfoot
To create a high-key lighting look using the Elinchrom D-Lite RX To Go Set, start by placing one flash head slightly to the side of the subject with a softbox in front of it as the main light, ensuring a soft and even illumination. To light the background, position your second flash head behind the subject pointed towards the background to achieve a bright and seamless effect. Fine-tune the lighting ratios by adjusting the power settings of each flash head, balancing the overall brightness. A pure white background will be achieved by making the background light 1 F Stop brighter than your working aperture, in effect, overexposing it. Be careful not to go too far above 1 stop as you will get reflected light onto your subject, giving a very unnatural rim light which can eat into the hair and clothing detail on the edges of your subject. Use a light meter or take test shots to make necessary adjustments to achieve the desired high-key effect, ensuring a clean, bright background and a well-illuminated subject.
To create a low-key lighting look, place one Elinchrom D-Lite RX flash head with a reflector or grid modifier (sold separately) at a 45-degree angle (Rembrandt Lighting) to the subject as the main light, creating dramatic lighting and, importantly, preventing light fall off on your background. Consider using a second flash head with modifiers such as snoots or grids for creating highlights whilst maintaining background separation.

Light your subject with a grid to keep a black background black (c) Simon Burfoot
When setting up your lighting in a home studio, it's worth considering using reflector panels to enhance your photography. They're a valuable tool for bouncing light back onto your subjects, reducing shadows, and providing a gentle fill light. They come in various sizes and colours, offering versatility and affordability. Additionally, reflectors need not be limited to store-bought options; you can also create homemade reflectors, using materials such as white card or cardboard coated in silver foil (There is a shiny and matte side to foil which will provide different effects). This allows for a budget-friendly alternative without compromising on the benefits they bring to your photography. Whether you opt for professionally-made reflectors or get creative with DIY alternatives, incorporating them into your lighting setup can help achieve more balanced and flattering illumination in your home studio.

Add a fill light with simple reflector placement
The most important tip of all is to practice and experiment with your home studio setup. The Elinchrom D-Lite RX To Go Sets offer a solid foundation, but it's up to you to explore and refine your skills. Learn from online tutorials, join photography communities, attend workshops and most importantly, shoot regularly to develop your unique style and artistic vision.
If you'd like to find out more via one of TFC's lighting workshops or webinars, head over to the website HERE to find out more about our upcoming educational classes for photographers.